Layout Management
Note
The Layout Management feature is only available if you have purchased the Customization Package of QMetry.
The Layout Management feature lets the admin show or hide fields and organize the page layout for the Add, Detail, Bulk, and Save New Version screens in modules. Default layouts are available for the Requirement, Test Case, Test Suite, and Issue modules.
The admin can arrange system and custom fields in the Requirement, Test Case, Test Suite, and Issue modules into different sections. The admin can also organize these sections on the page layout as needed.
The admin can customize the page layout by showing or hiding system and custom fields.
For example, a QA organization may not use the Test Category system field shown in the default QMetry layout. Since it takes up space and disrupts the add and edit flow, the admin uses Layout Management to remove the Test Category field from the standard page layout. This saves space and makes the add and edit process easier.
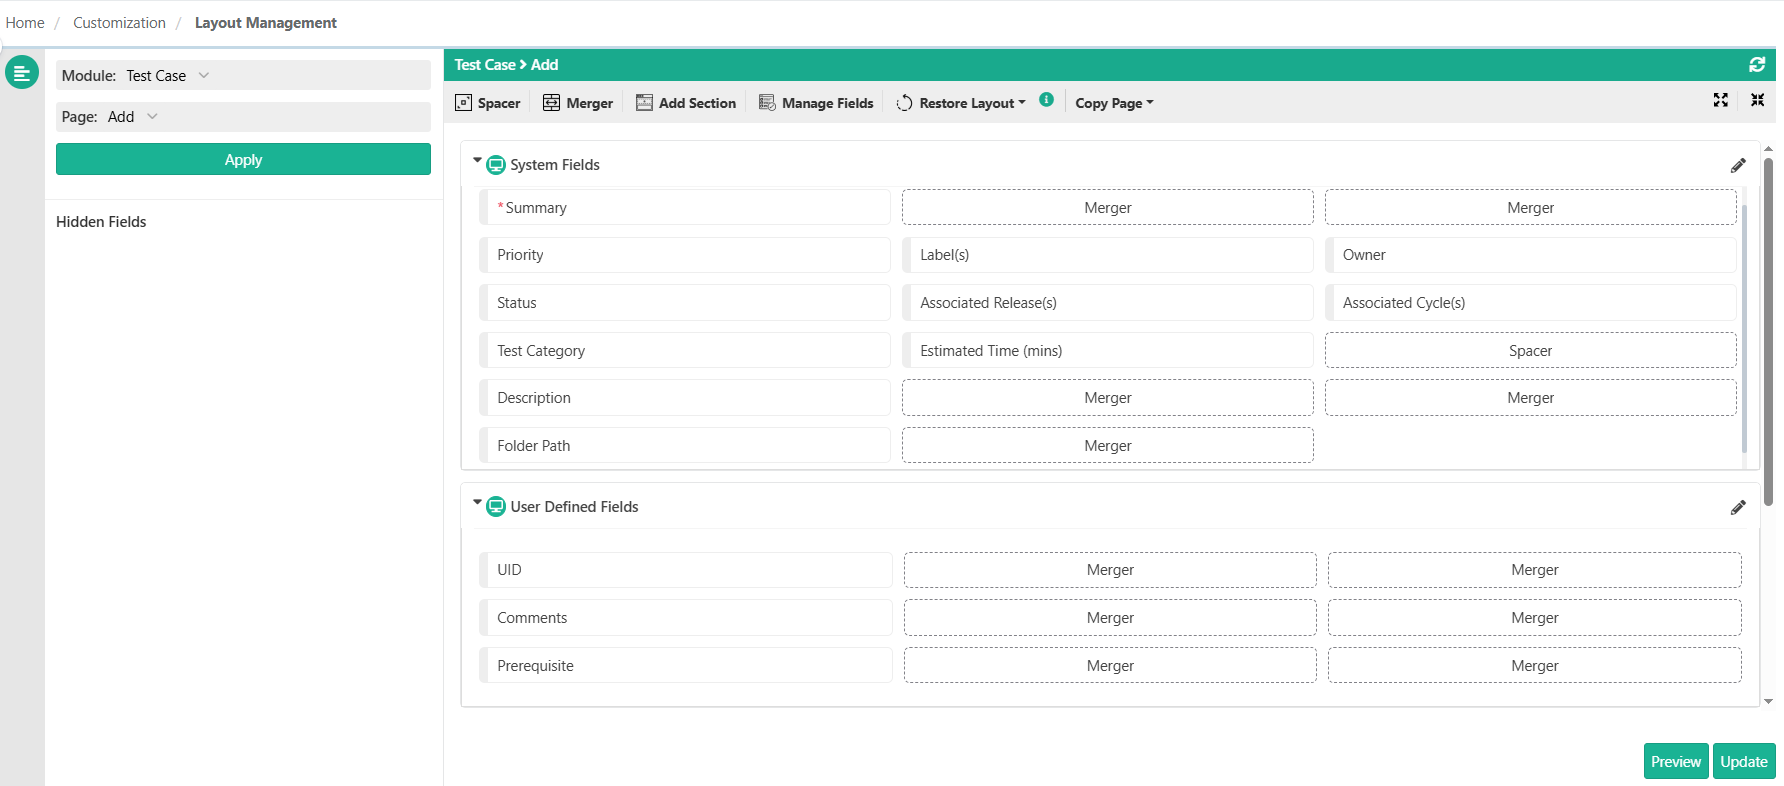
You can access Layout Management under the Customization section.
 |
Page Layout
A page layout or template is a saved setup of fields and their positions for a specific screen in a QMetry module. For example, “Add Test Case” is a screen in the Test Case module.
Note
You manage the layout at the project level. Any changes apply to all users in that project.
The left panel shows drop-down lists for Module and Page. When you select them, the default layout appears on the right.
Modules | Available Page Layout |
|---|---|
Requirement | Add, Detail, Bulk, Save as New Version |
Test Case | Add, Detail, Bulk, Save as New Version |
Test Suite | Add, Detail, Bulk |
Issue | Add, Detail, Bulk |
Updating a Page Layout
You can make changes to the default page layout to suit your organization’s needs.
To update a page layout, perform these steps:
Select the module on the Module drop-down.
Select the Page to update the default page layout.
Click Apply.
The default layout of the page opens at the right.
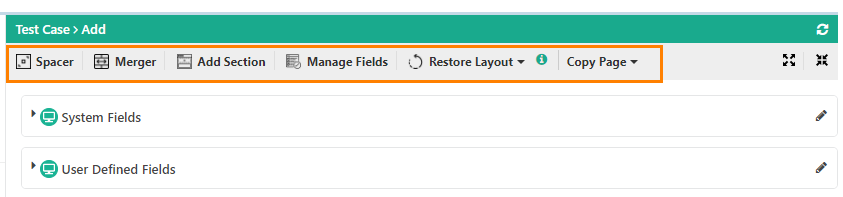
Use the toolbar options to update the page layout. See the sections below for details.
Toolbar options
Spacer: Click this option to drop the spacer field in the hidden fields section. Drag and drop it to the field’s desired location.
Merger: Click the option to drop the merge field in the hidden fields section. Drag and drop it to the field’s desired location.
Add Section: Click to add a new section with either the "Collapsed" state or "Expanded" state on the page.
Manage Fields: The option allows the user to create and manage Manage Fields.
Collapse All/Expand All: Use the icons to collapse or expand all sections on the screen.
Restore Layout: There are two options on this toolbar button:
Load to previously saved state: Loads the layout as it was last saved.
Load to system default: Loads the default system layout settings.
Copy Page: Copy fields from another view to the current view. For example, while the Add view is open, you can copy fields from the Bulk view.
Buttons at the bottom of the page layout screen:
Preview: Click to have a preview of the module page before you save the page layout.
Update: Click to save the layout of the module page.
Specially Treated Sections
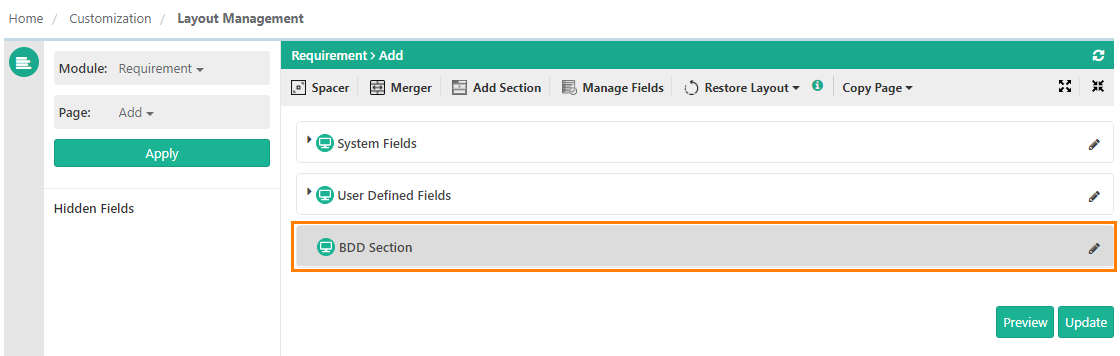
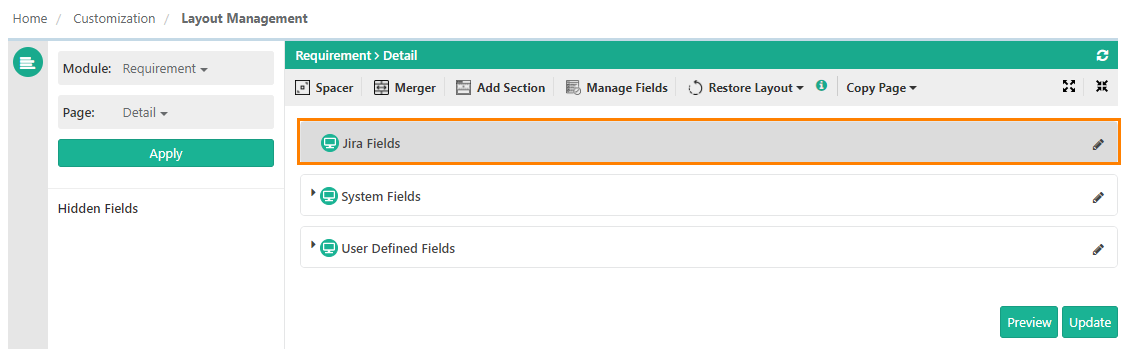
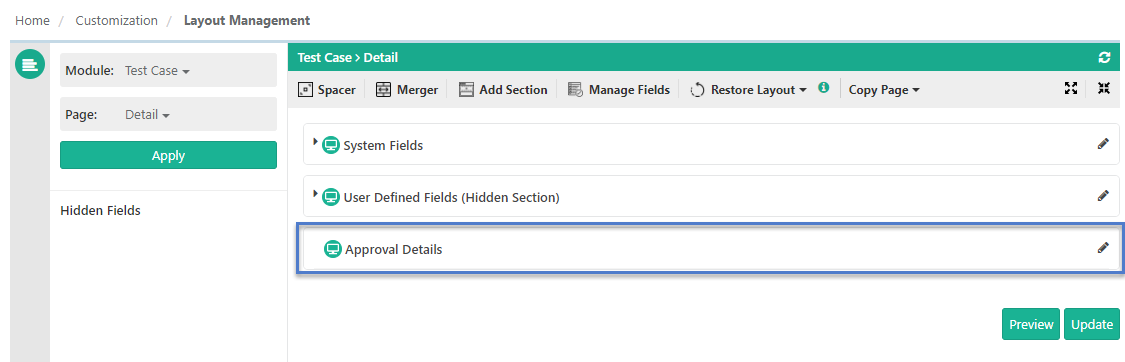
The system handles the BDD section, Approval Workflow section, and external tracker section separately. It shows only the section headers on the page layout without fields underneath, and you can arrange these sections on the page.
If your QMetry project integrates with BDD, Jira, or Azure, the system shows the corresponding sections on the page layout of the relevant modules.
When you integrate an external tracker with the Issue module, the system removes the Issue module page layout from Layout Management.
BDD: When BDD is configured with the QMetry project
 |
External Tracker: When an external tracker like Jira is integrated with the QMetry project
 |
Approval Workflow: When the eSignature feature is enabled for the QMetry project
 |
Spacer
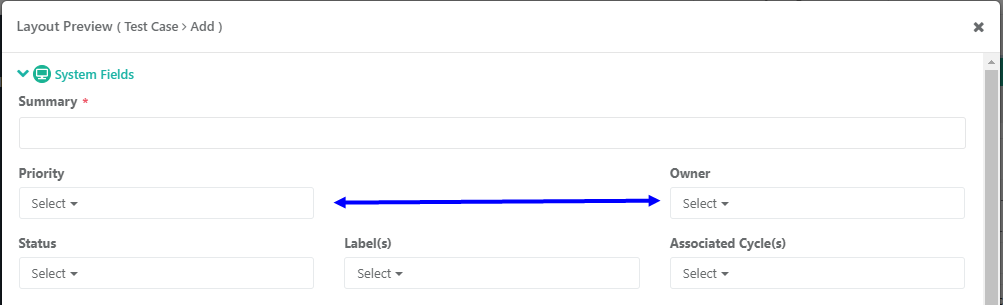
You can use Spacer to insert a space between two fields. The field size remains unchanged.
Click Spacer option on the toolbar. This adds the spacer on the panel,
Drag the spacer to the desired location.
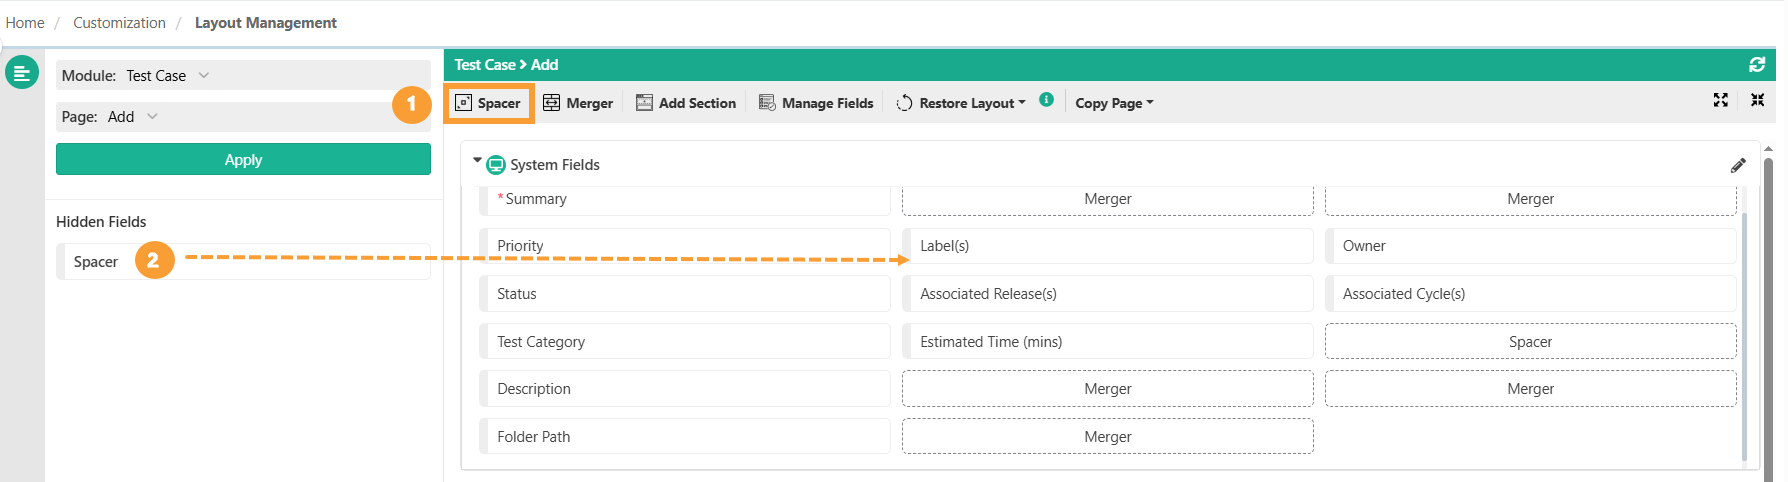
Place the spacer on the layout.
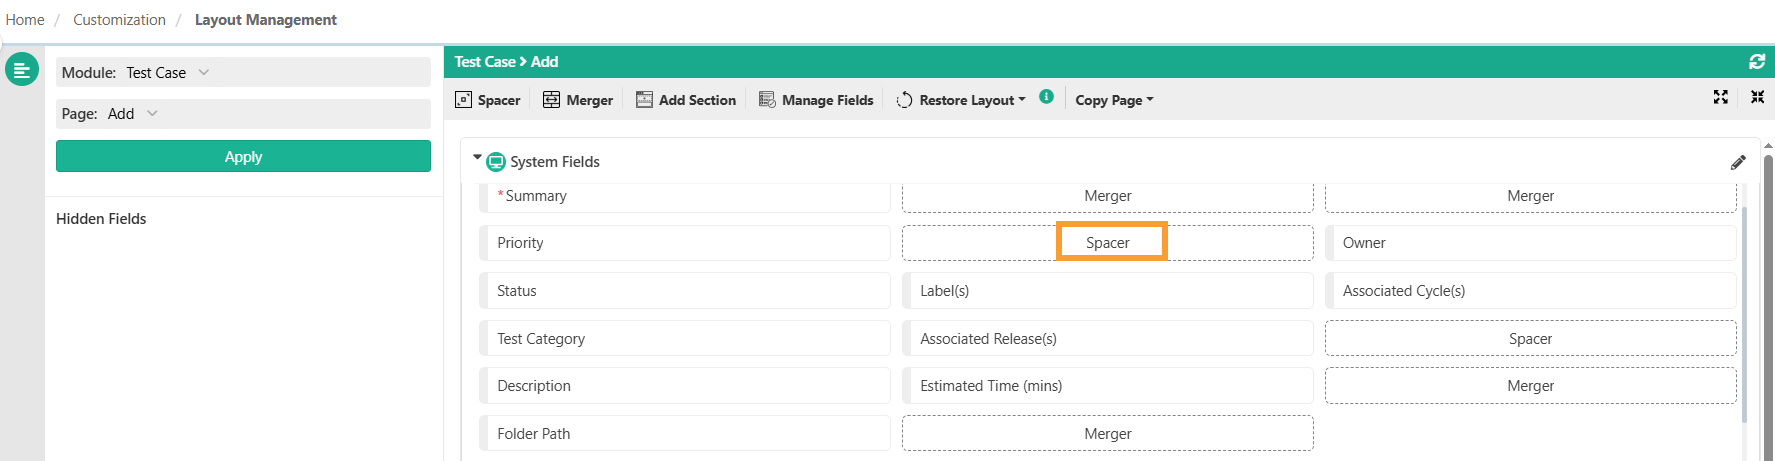
Preview the layout. You can see the space added between the fields.
To remove the space on the layout, hover over the spacer and click the cancel x sign.
Merger
You can use Merger to merge the two fields - making the field size bigger.
Drag and drop the merge filed in the hidden fields section.
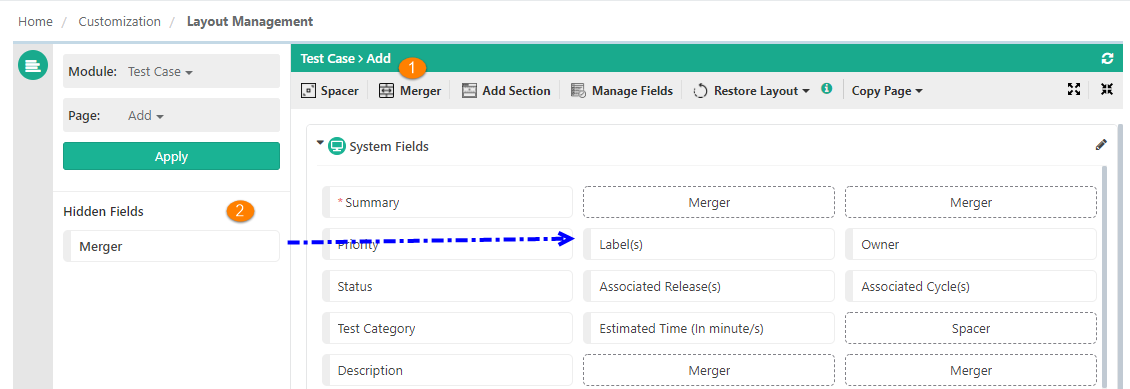
The system adds the merger on the layout.
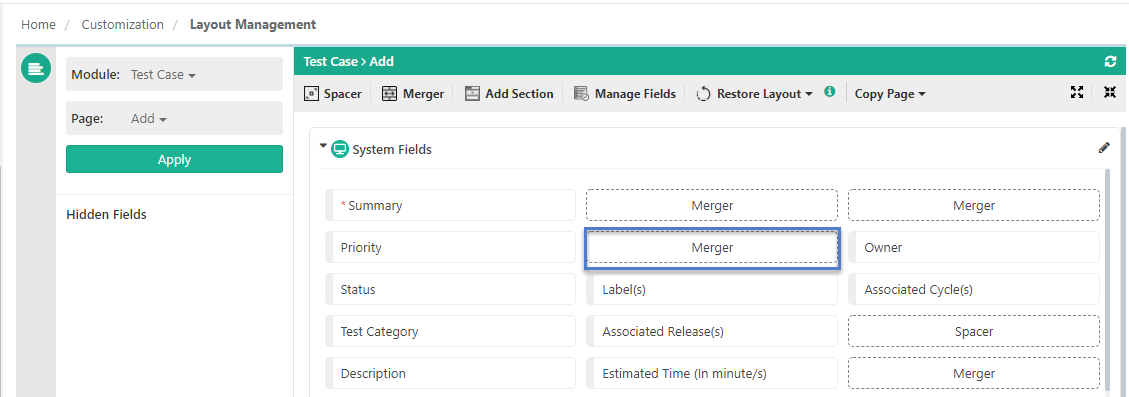
Preview the layout. You can see the two fields are merged.
Add a Section
The default page layout view shows system sections. You can add custom sections to the page layout.
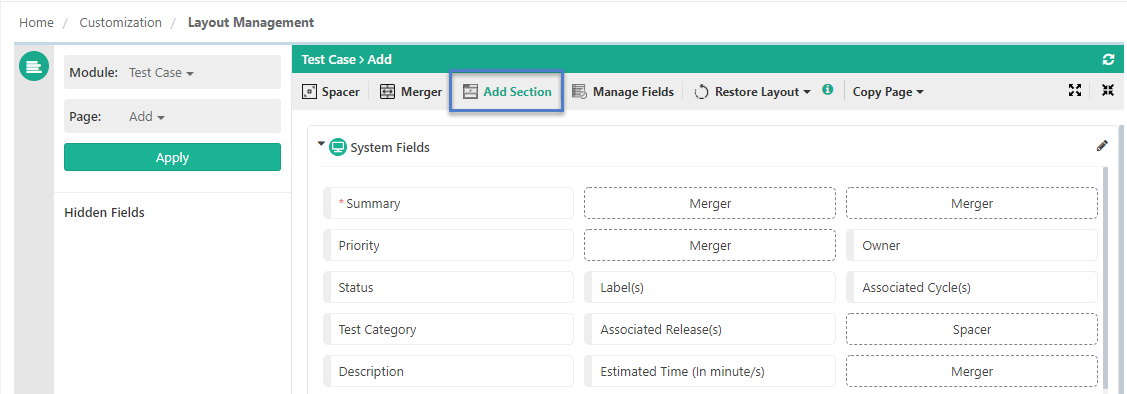
Click Add Section toolbar option to add a new section to the selected page.
 |
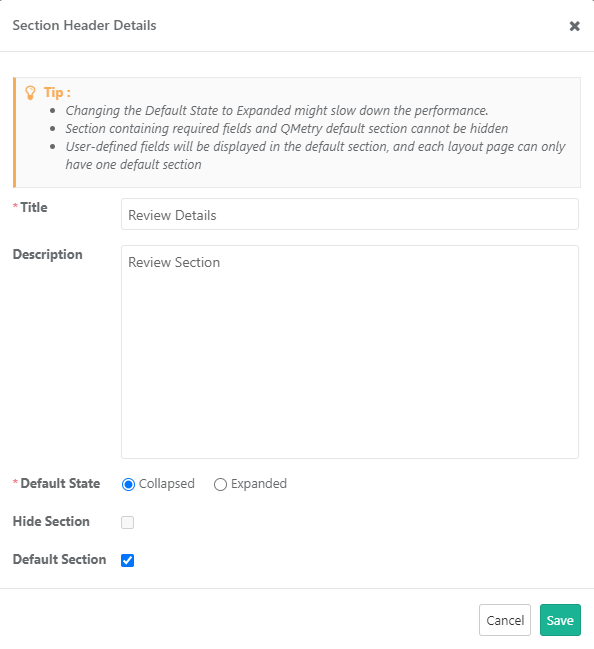
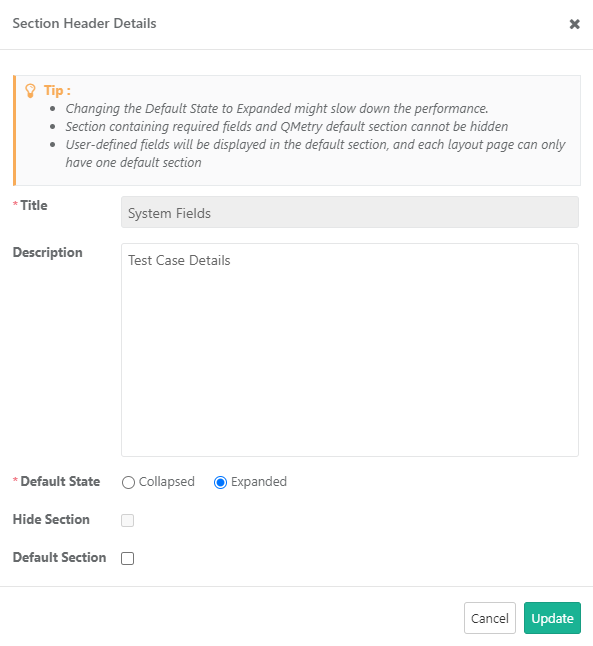
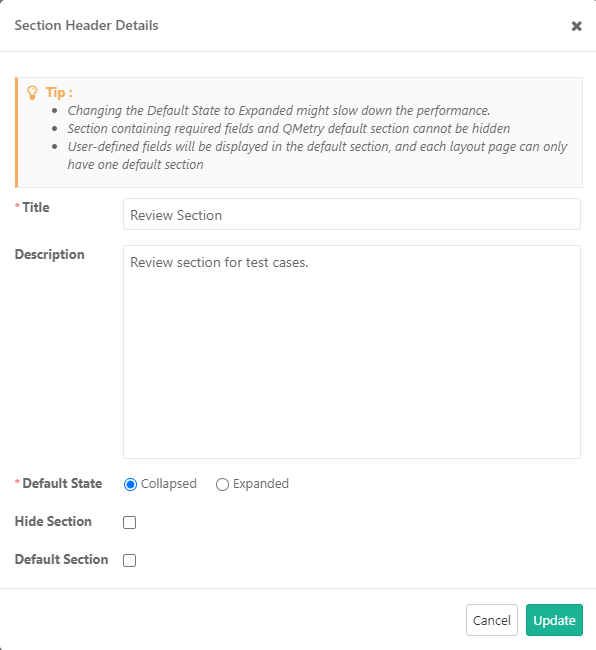
The Section Header Details pop-up opens.
Title: Enter a section title. Each custom section must have a unique title.
Description: Enter Description for the section.
Default State: Select from Collapsed and Expanded.
Note
Changing the Default State to Expanded might slow down the performance.
Hide Section:If you do not want to display a custom section on the module page, select the Hide Section checkbox. The system keeps the section hidden along with its fields. You cannot hide system sections.
Default Section: Select the Default Section checkbox to set the section as the default on the module page. When you create a new user-defined field, the system adds it to this default section.
Note
You cannot hide sections that contain required fields or QMetry default sections marked as “Default Section.”
The system displays UDFs in the default section, and each layout page has only one default section.
Click Save to save the section header details.
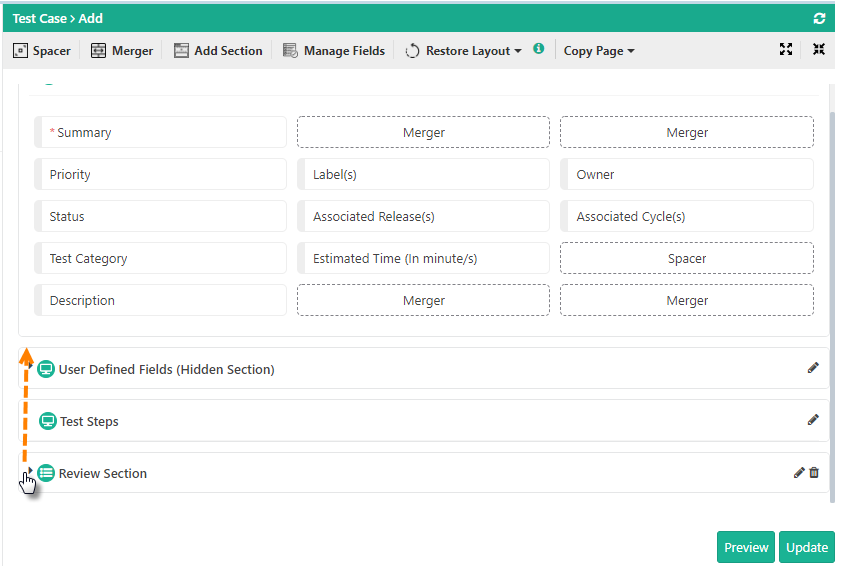
Arranging Sections on the Page
You can arrange the section through the drag and drop operation on the page. Keep the sections collapsed while shuffling the sections.
 |
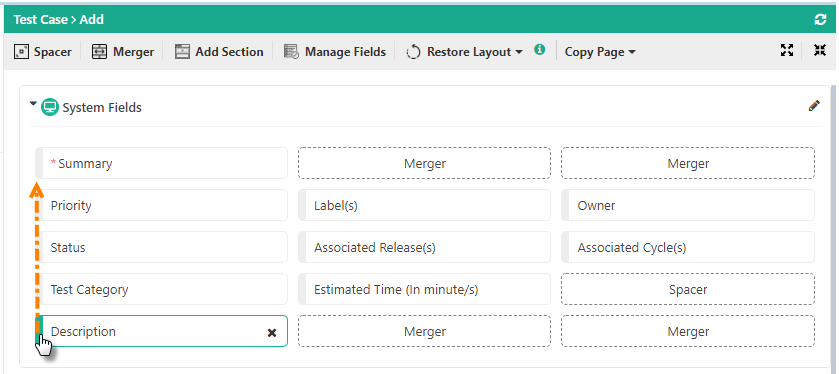
Arranging Fields in a Section
You can arrange system and custom fields in the Requirement, Test Case, Test Suite, and Issue modules into different sections. For example, you can place mandatory fields at the top and custom fields at the bottom of a section.
 |
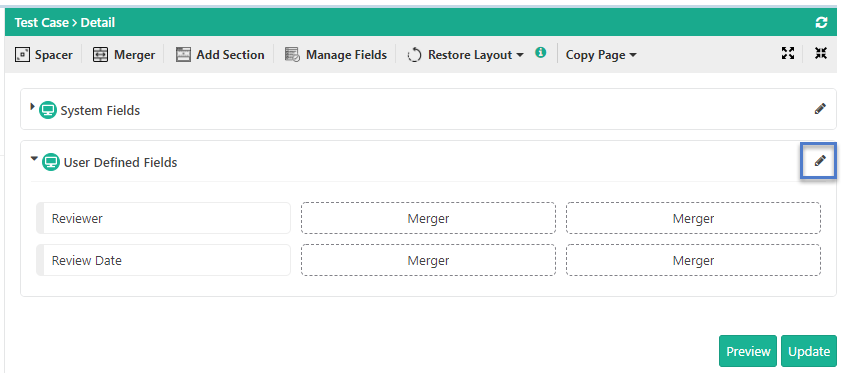
Editing a Section
You can edit each section by clicking the Edit icon for that section.
 |
System sections | Custom sections | ||
|---|---|---|---|
You can change the Description and Default State of system sections. You can not change the Title of system sections and hide system sections. | You can change the Title, Description, and Default State of custom sections. You can opt to hide custom sections on the page. | ||
|
|
Hiding Fields or Removing Component
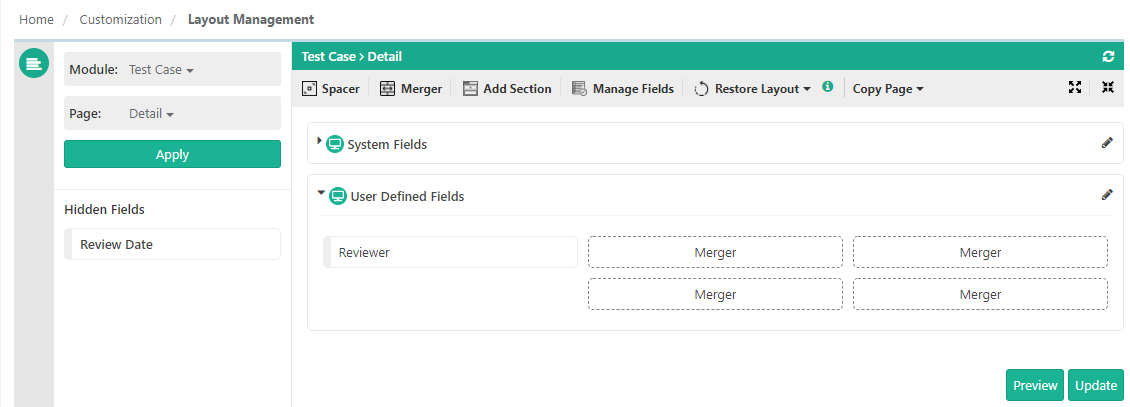
You can hide or remove spacer, merger or field from the screen. The removed spacer, merge or field appears on the left panel under Hidden Fields.
You cannot hide a mandatory custom field (marked as “Mandatory” under Manage Fields). You also cannot hide a custom section that contains mandatory fields.
If you hide a non-mandatory field or its section and then try to mark it as Mandatory in Manage Fields, the system shows a warning. You must first make the field visible on the page layout before you can mark it as Mandatory.
To hide or remove a field on the page, follow either of the following -
Hover the mouse over it and click the "X" sign.
Drag the field to the Hidden Fields panel at left.
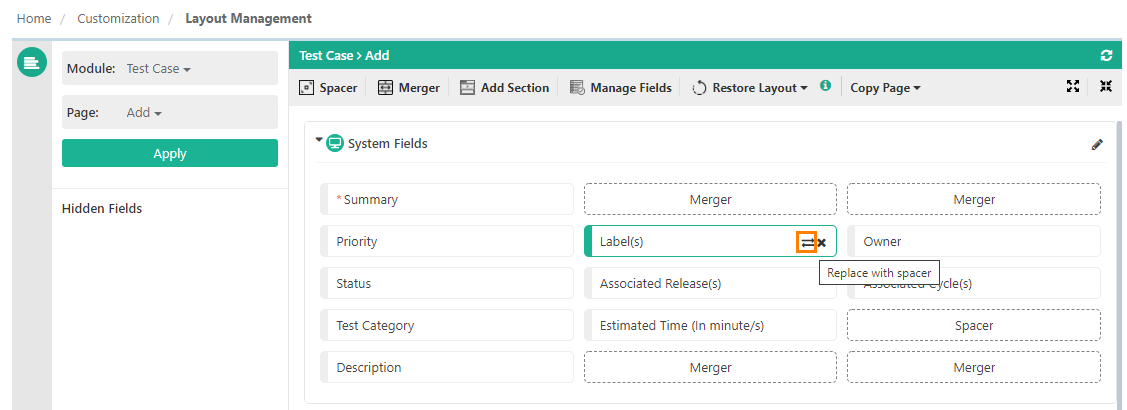
Replace Field with Spacer
Use the swap button to preserve the existing layout when you remove a field. It keeps the positions of other fields unchanged and maintains the layout design.
 |
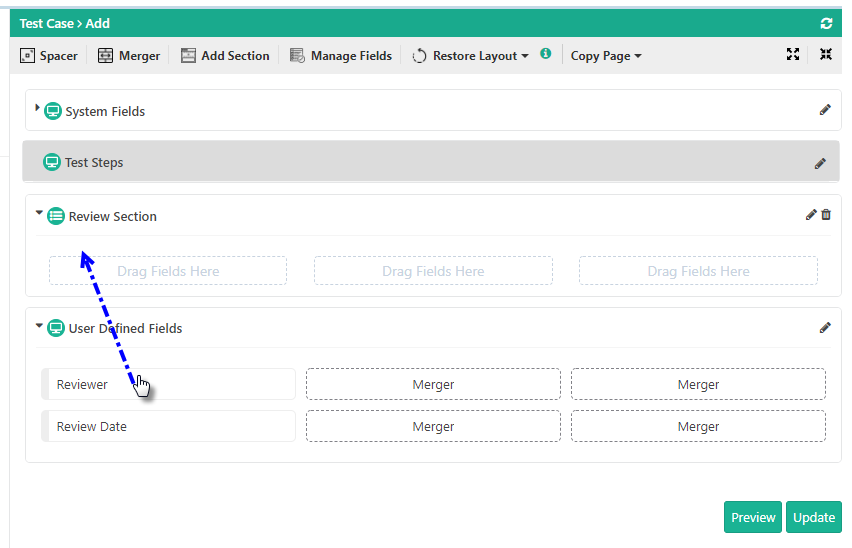
Arrange/Move Fields across Sections
Associated Releases and Associated Cycles must stay in the same section. If you move them, move both fields together. If you move only one field, the system shows an error when you save the page layout.
A. You can move fields from one section to another through the drag and drop operation.
 |
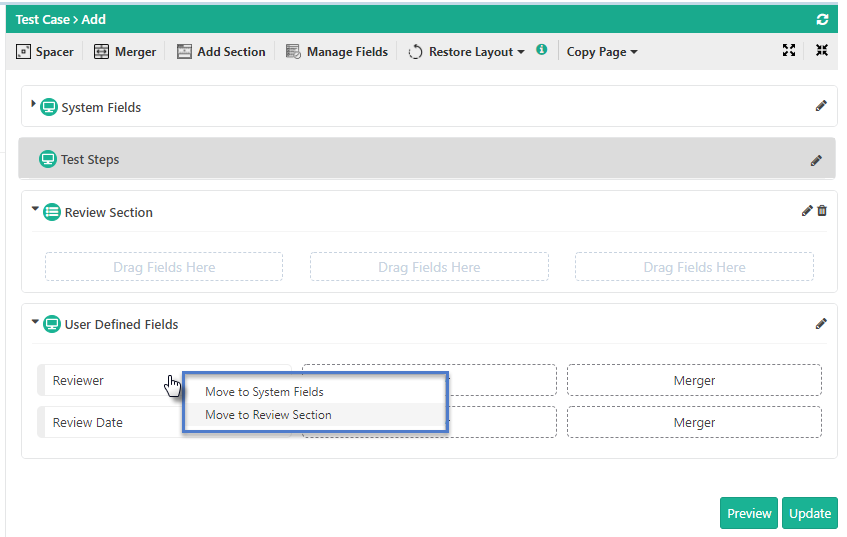
B. Right-click on the field. It shows options as per the available sections on the page. Select the section in which you want to move the field.
 |
Copy Page
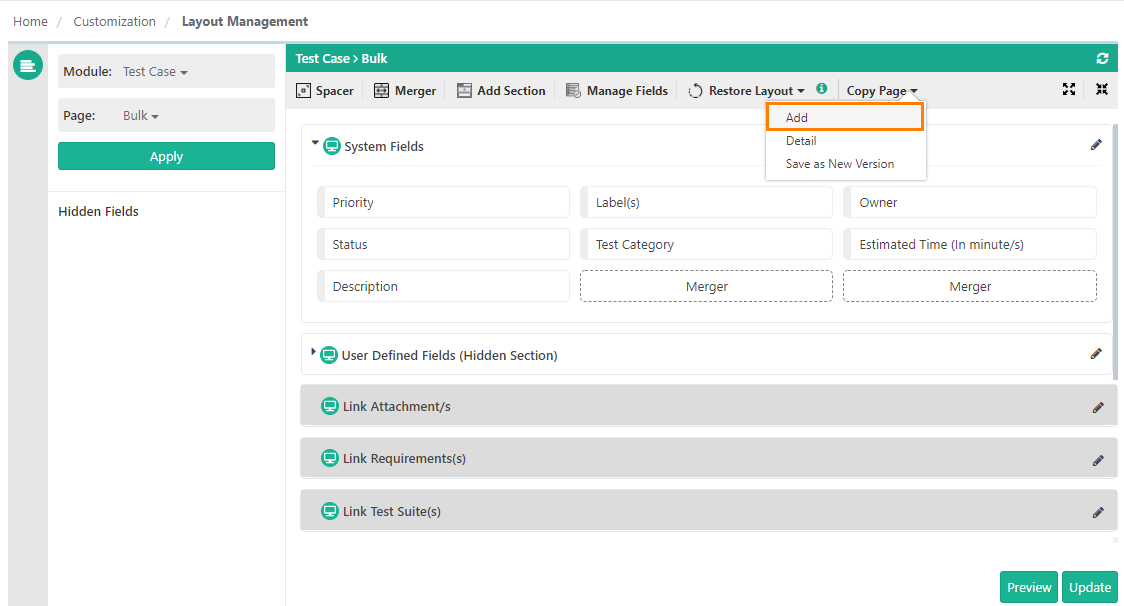
The Copy From feature lets users copy layouts between pages in the same module. It copies custom sections and their arrangement to the destination page.
This feature lets you copy sections and fields from one view to another. For example, users can copy sections and fields from the Add view to the Bulk view. It helps keep a consistent page layout across
 |
Refresh Layout
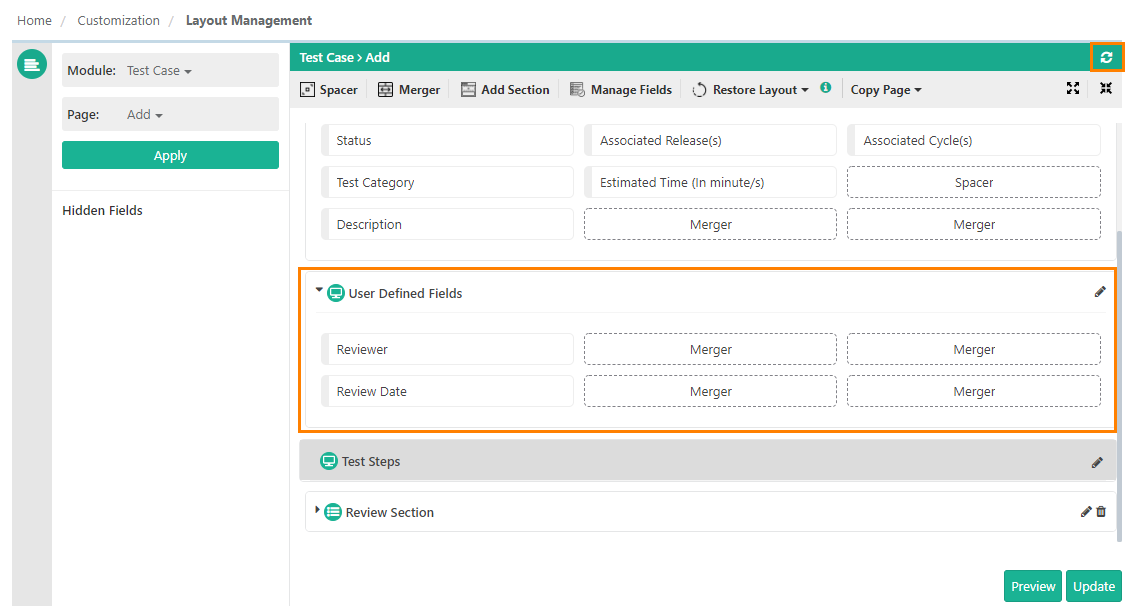
To sync the current layout with any changes done in the Manage Fields section, click the Refresh Layout icon placed at the top right corner.
Note
Before clicking Refresh, save all the changes you have done in the layout.
 |