QMetry BDD Installation Guide (Podman)
This guide walks you through the installation process of QMetry BDD.Setting up QMetry BDD with your on-premise QMetry Test Management installation enables seamless integration of behavior-driven development practices into your testing workflow. With QMetry BDD, you can manage feature files, automate test executions, and streamline collaboration between business and technical teams.
QMetry BDD Installation Options
You can install QMetry BDD on the same server where the QTM Application is installed.
Pre-requisites for the Installation
Before installing QMetry BDD, ensure the following:
QMetry Application should be pre-installed. Refer to QMetry and Reports Installation on Linux - 2 Tier (RHEL8, RHEL9 & Podman) to install the QMetry Application. Follow Steps 1 to 7 (up to Enter Base URL) mentioned in the Install QMetry Application section. Please note that Step 7 is mandatory.
Active MQ server is configured with QTM Application.
All the servers must support the commands: unzip, curl, vim.
On a machine with internet access, download the podman images. Refer to Download and Restore Container Images of QMetry Products.
Ensure Proxy servers are not blocking downloads.
Install podman and podman-compose using root user.
Restore these podman images on the machine where you want to install QMetry
Get the
QMetry_RHEL_Installer.zipfile from QMetry Support.Required Ports
Installation
Ports that need to be enabled and should be available for use
ActiveMQ Server
8181 & 61616
Note
In case of rootless installation
It is mandatory to follow the steps mentioned for Podman and Podman-Compose Installation.
Installing QMetry BDD Server
Copy the QMetry_RHEL_Installer.zip installation file received from QMetry Support to your server and unzip it. Navigate to the directory where these files are saved.
unzip QMetry_RHEL_Installer.zip
cd QMetry_RHEL_Installer
Run the following commands.
sudo su
chmod +x install.sh
./install.sh
Select Installation Type: Online or Offline
Options
Allowed Values
Default Value
Recommended Value
Do you want to make an online installation (Y/N)?
Y, y, N, n
Y
Y
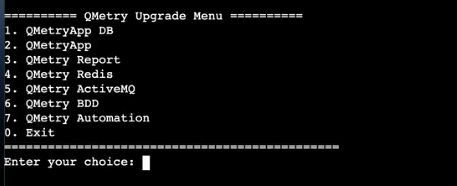
Main Installation Menu: Type 6 to initiate QMetry BDD Installation
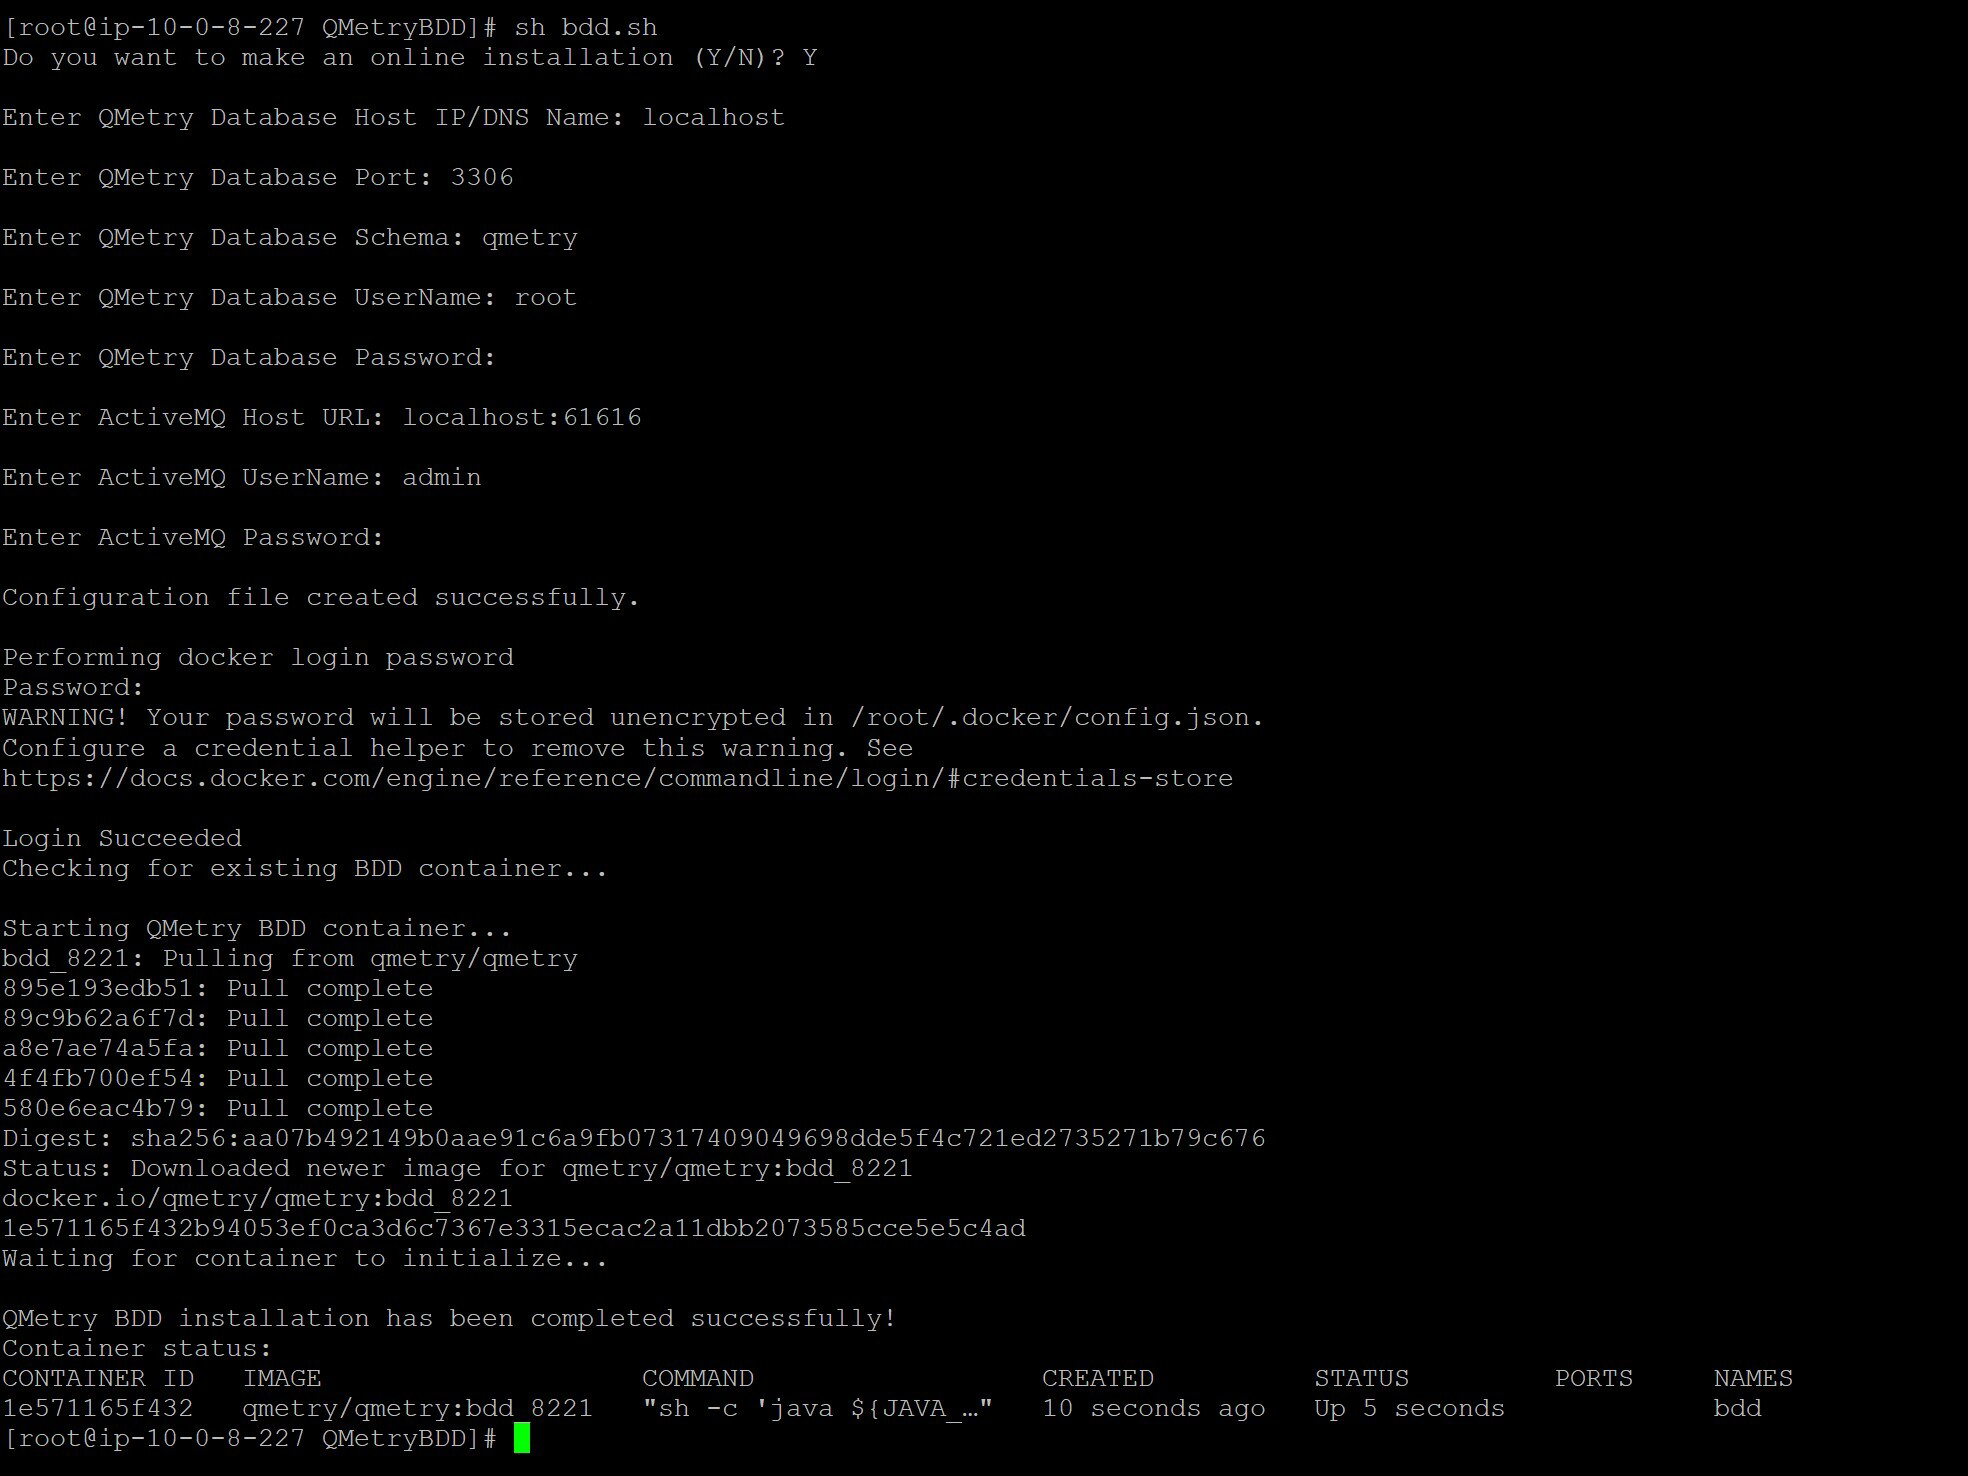
Enter configuration parameters as requested:
Prompt
Description
Example
Enter QMetry Database Host IP/DNS Name:
Host address where QMetry database is running.
Note: In case of AWS installation enter the private IP of the AWS instance where the QTM Application's database is installed.
QTM Application's database host
Enter QMetry Database Port (3306)
Database port number.
3306
Enter QMetry Database Schema (qmetry)
Schema name to be used by QMetry BDD.
qmetry
Enter QMetry Database UserName (root)
Database user with necessary rights.
root
Enter QMetry Database Password
Password for the above database user.
qmetry
Enter ActiveMQ Host URL
Host URL of ActiveMQ messaging service.
localhost:61616
Enter ActiveMQ UserName
Username for ActiveMQ authentication.
admin
Enter ActiveMQ Password:
Password for ActiveMQ user.
-
Enter the podman credentials provided by the support team.
The installation may take a while.
Once the installation is complete, execute the following command.
podman ps
Check for confirmation message - QMetry BDD Installation has been completed successfully.
Get support
For any installation issue, raise a ticket on the Support Portal.